Sequence and Organization of the Unit
The unit was developed primarily through the request of the principal at Polaris Expeditionary Learning School. Fourth and fifth graders at the time were in the midst of studying space in their science class, with an emphasis on the Sun, Moon, and stars. It was requested that each art lesson was somehow tied back to these science concepts. At times, it was challenging to create lessons where art and science played equal roles in the student learning process. It occurred to me early in the process that lessons with more than one subject matter will often lean towards or emphasize one over the other. I did not want to create a unit in which students learned about science through art or vice versa. The goal was to develop lessons where students were able to have equal takeaway about both art and science.
In this unit, students explored a variety of art making methods that require students to experiment and think critically about the choices they are making. Students explored deeply what processes and/or techniques may or may not work at a given time. Planning and reflection became a key step in each art process. They considered the importance of planning in art making and how plans can influence later steps. Reflection was also demonstrated frequently in this unit; students looked back at their choices and thought about what did or didn’t work and why. Along with these concepts, students also explored how artists are responding to the world, how science and art are influenced by each other, and how to create works of art that are relevant to their lives and what is important to them. (Click button below to view full unit plan)
In this unit, students explored a variety of art making methods that require students to experiment and think critically about the choices they are making. Students explored deeply what processes and/or techniques may or may not work at a given time. Planning and reflection became a key step in each art process. They considered the importance of planning in art making and how plans can influence later steps. Reflection was also demonstrated frequently in this unit; students looked back at their choices and thought about what did or didn’t work and why. Along with these concepts, students also explored how artists are responding to the world, how science and art are influenced by each other, and how to create works of art that are relevant to their lives and what is important to them. (Click button below to view full unit plan)
Methods for Integrating Literacy, Numeracy, Technology and Other Relevant Subjects
Literacy was utilized in each one of our lessons with the 4th and 5th grade students at Polaris. At the end of each lesson, students participated in a reflective activity that analyzed their artwork and the artwork of their peers. In these activities, students often discussed with partners and the whole class about some of their artistic decisions and why or why not they were effective. In some of these activities, students wrote in their sketchbook journals about a process or experience. For example, in our lesson about Cyanotype printing, students were asked to write down and explain the steps of this procedure using terms simple enough that a person who is new to the technique would be able to follow it.
Numeracy was also included in lessons throughout the unit. Students planned often in their sketchbooks and by using ‘idea menus.’ For example in the Cyanotype lesson, students gathered found objects from the school playground and experimented with arrangements in their sketchbooks. Students were asked to consider at least three different compositions/arrangements in this part of the lesson. One other example in the unit where numeracy was utilized was in the monoprinting lesson. Students transferred images from a piece of plexi-glass onto a piece of damp paper. The students experimented by creating at least three prints in this process, determining what worked well and what they would like to change for the upcoming attempt. The main thing students played with was how wet their paper was. Some students used a lot of water to get a ‘runny’ look while other students tried a drier piece of paper to obtain a more textured look.
Technology was used in nearly every lesson by the use of the SMART Board. We would begin each day by looking at our class blog from the previous week and used the board to view examples of artists’ work to help students formulate ideas for their projects. In some lessons, we showed examples of artists who create digital artwork on Photoshop or other similar programs. Along with this, there was one lesson where students used their personal computers to search for imagery to help them sketch and create ideas.
Each of our lessons for this unit was connected back to science, specifically, the sun, moon, and/or stars. Students explored how art and science have a relationship and how one can influence the other. For this unit students investigated the idea of discovery, and for the semester students explored various outer space phenomena. Students used art to help them learn about science, and science to learn about art.
Our students utilized 21st century skills frequently. In nearly every class period, students needed to plan and follow a series of steps correctly in order to be successful. For example in monoprinting, students needed to start by drawing a design on plexiglass with marker, dampen a piece of paper, then use that piece of paper to place on top of the original design and apply pressure in order to transfer the image. The process would not have worked the same way if these steps were not followed. One other skill students utilized in this class was creative problem solving. In the paper marbling lesson for example, students would try out the process and find out that their design didn’t quite turn out like they had wanted it to. From that, students would make note of what they did, and then attempt the process in a slightly different way to change the results of the final artwork. Creative problem solving was used in nearly every single class period by students, but this is just one example.
Classroom Management Strategies Related to Instruction
In Alicia’s classroom, she already had a handful of management strategies that were effectively put into practice, and clearly understood by students. To keep the classroom culture consistent for the students, we would utilize many of these management strategies in our art class. One of these strategies was a ‘Physical and Mental Check-In’ with the students every Friday morning. When class started, the students would all sit down on the futon seats and meet for group. One leader would be designated to take attendance and start off the check in. Students would usually give a thumbs up, thumbs sideways, or thumbs down about how they were feeling both physically and mentally. Students would give a brief sentence or two explaining why they were feeling the way that they do for that particular day. After every student shared their thoughts and feelings, we would begin each art class period by staying in the group circle and viewing the class blog from the previous week. This gave students the opportunity to recap what occurred the week before and share any challenges or successes in the previous art class. The final thing that we would do each week in the group circle would be to instruct the students what they would be doing and working on that day. To ensure that directions were understood, we would often ask one student to repeat for the rest of the class what was just said. This strategy was also used, and became very effective, when teaching students proper safety with certain materials and techniques.
Another instructional management strategy that was useful in teaching art to Alicia’s class was the use of a drum or bell in order to gain the attention of the entire class when they were working. The first chime or drum would signal to the students that they needed to stop what they were doing, and the second chime or drum would signal to the students that they need to be actively listening with their eyes on the speaker. Often times, a teacher would ask for a student volunteer to assist in gaining the attention of the whole group. This strategy became very useful when switching activities, sharing insights, and beginning clean up. In some of our large group discussions, whether that was in group setting or during work time, there would be some instances where teachers needed to remind students about being active listeners. When a teacher or student was speaking to the whole group, everyone else in the room was expected to be fully engaged and listening attentively. If students were not displaying this respect to the speaker, teachers would do one of two things. One strategy that was implemented was saying, “Hold on, I don’t think everyone is using their full listening skills. Could you please repeat what you just said when everyone is quiet and listening?” This strategy was generally used when a handful of students were off task and holding side conversations. The other strategy that was implemented throughout the semester when holding group discussions was following Alicia’s ‘1, 2, 3’ redirect system. If a teacher noticed a student being disruptive, they would go over to the student and say, “Hey, you’re at a one right now.” This would turn into a two, or three if the behavior continued, but generally speaking, students needed a simple reminder. This management strategy was utilized only one or two students were not displaying active listening.
Throughout the semester teaching at Polaris, we would utilize stations in our art making days; this became useful as students finished their projects at different times than others. Providing students with stations also allowed for students to move about the room more and have some opportunity to interact with their peers. In our paper marbling Nebula project for example, half of the tables were used for the shaving cream and food coloring marbling process and the other half of the workstations were used for students to add drawing and other collage elements to their artwork. For this lesson, one half of the students started at the paper marbling station and the other half began creating additive elements for their Nebula. About halfway through the class period, students switched what stations they were working at. This strategy allowed for students to have more room working, and helped contain the shaving cream to specific areas. One other example a lesson where we utilized stations was in the monoprinting and painting exploration day of the Supernova project. On the day where all of the students were monoprinting there were a handful of students who were absent, so this became an effective strategy for the next week. Providing a monoprinting station for the second day of the lesson allowed for the students who missed the previous day to create monoprints, and also allowed for students who wanted to continue this exploration to do so.
Clean up organization became important to ensure that the room was back to its’ original state for the rest of the class period. For the most part Alicia had the students in a clear routine that they all understood; every single material has a home. This was applied in our art class as well; for example students sketchbooks ‘lived’ on the very back table. When students were released for individual work time, students knew that this is where their sketchbooks would be and they knew that this is where they needed to be put back at the end of the class. If we brought any ‘special materials’ (ie. watercolor pencils), we would be very clear in our instruction to students that these pencils need to put back in the correct box at the end of the class. In most class periods, we would reserve the last ten minutes of class for cleaning. Generally if a teacher said to the students, “Please put back the materials into their correct homes, put your sketchbooks away, throw away any scraps, check the floor for trash, and wipe down the tables,” students would understand and clean the room very efficiently. There were a couple of days throughout the semester that clean up was more intensive and required different instruction; Cyanotype printing is a good example of this. For this lesson, there were a lot of materials (some of which could stain carpet, clothes, or skin) and required students to follow specific instructions to clean efficiently and safely. In this lesson, it was instructed to students that there would be one person from each table to wash and rinse brushes; one student to collect and organize their tables’ prints onto a towel; one student to dump out the water buckets and the Cyanotype solution down the sink; and finally one student to organize the matte board and clean scraps on the table and the ground. Giving each student a specific duty for clean up became an effective strategy in managing clean up.
In my opinion, one of the most effective ways to manage a classroom is to provide students with engaging and interesting art experiences. In my observations and teaching experiences at Polaris, I noted that the more interested a student is in their art making the less likely they are to shift their focus and cause disruption. In the days where students were involved with hands on and interactive processes, behavior management was significantly less. Providing students the opportunity to experiment and try out exciting and ‘magical’ art processes leads to deeper engagement and involvement. This was probably one of my biggest takeaways from my teaching experiences at Polaris.
Lesson Plans and Documentation
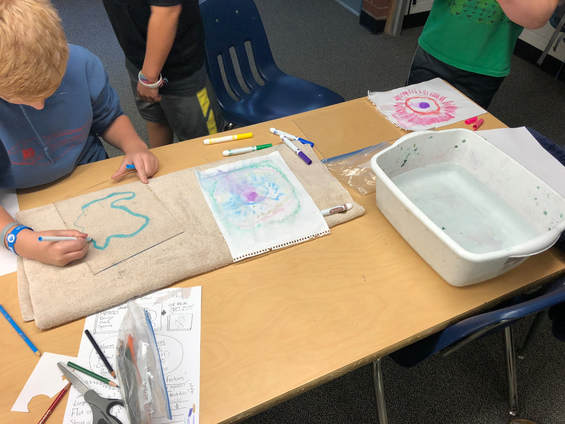
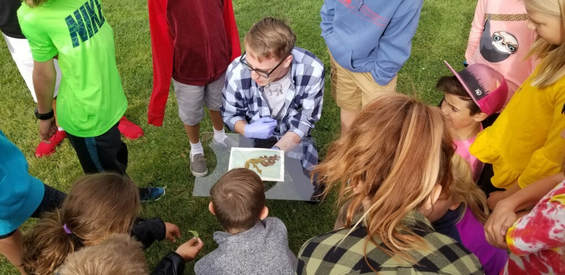
Cyanotype Prints - In this lesson, students begin by viewing historical and contemporary examples of Cyanotype artwork. Students look at the artwork of Frederick Coulson, Man Ray, Annie Lopez, and Dan Peyton. The main focus is for students to look at how these artists utilize line and shape. After this part of the lesson, students go out and explore the school grounds for various found and natural objects. Students study these objects carefully and explore creating compositions by drawing in their sketchbooks. Once these sketches are completed, students create Cyanotype prints. Students coat the paper, arrange objects onto the paper to create a composition, expose them to UV light, and wash them in a bath. Once this process is completed, students view each other’s art work in a gallery walk setting. Students are also asked to reflect on the process and write down the steps to Cyanotype printing in their sketchbooks.
Cyanotype Lesson Plan Link
Lesson 1 - Day 1
Lesson 1 - Day 2
Lesson 1 - Day 3
Lesson 1 - Day 4 (Revisit)
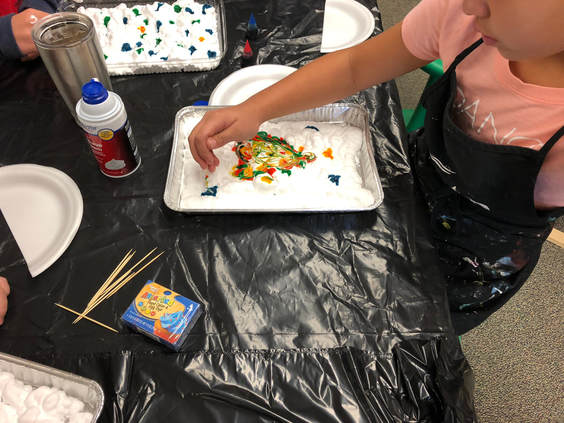
Nebula Explorations (Paper Marbling) - This lesson begins with students viewing photographs of Nebulae found in space with telescopes. Students are asked to look at and identify line, shape, colors, and forms in the photographic examples. The students are then asked to brainstorm a Nebula they want to create in their sketchbooks. To assist them in the brainstorming process, students are given and ‘idea menu’ providing some options for students to choose from. Once students have their ideas solidified, they start marbling paper by using shaving cream and food coloring. Students begin this process by putting a layer of shaving cream into a tray. They add drops of food coloring to the surface and swirl the colors around with a toothpick. Finally, students lay a piece of paper down into the tray and apply light pressure, then remove the paper from the tray and squeegee excess shaving cream. Students are also asked to consider adding collage elements (paper shapes, tin foil, etc.) onto their artwork. To reflect on the process, students are asked to work in small groups and place a ‘token’ on a peer’s artwork that they feel is a good idea, is relatable to, or is well crafted.
Supernova Prints (Monoprints) - This lesson begins with students looking at photographs from space of Supernovas, and the artwork of Corey Ford, Sandro Pachvashvili, and Izabel Raa. Students are asked to consider how each artist and depiction is utilizing shape, color, and size. Students are also asked to consider if the artists are taking a realistic or abstract approach in their art making and possible reasons why they would do this. Students are then prompted to generate a ‘discovered’ Supernova. Once this part of the lesson is completed, students are asked to brainstorm ideas in their sketchbooks. To assist the students in coming up with ideas, they are given the option to utilize an ‘idea menu’ in this step of the lesson. When their ideas are solidified, students begin their art by creating a monoprint. Students draw a design with a marker onto plexi-glass, and place a damp piece of paper onto the surface of the plexi-glass, and use pressure to transfer the image onto the paper. Once students complete their monoprints, they have the opportunity to add mixed media elements to their artwork. Students can add painting, drawing, and other mediums to their prints. As students finish adding various mediums to their Supernovas, they will have the opportunity to collage and mix multiple artworks onto one page. Once the creation process is completed, students are asked to discuss and/or write why their discovered Supernova should earn them a place on the NASA science team. Students will be asked to focus their language on shapes, colors, sizes, and any personal connections they made in their artwork.